Acer File Extensions |
Acer Acros Chassis
This section provides information about the chassis used by Acer Acros systems including layout and expansion potential.
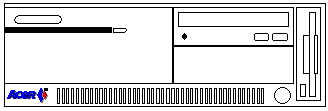
Acros Desktop (Original)
Specifications
- Dimensions (h x d x w) - 128mm x 418mm x 368mm.
- 5.25 inch device bays - 2 (1 free - 1 used by CD).
- 3.5 inch device bays - 2 (0 free - 1 used by floppy , 1 by hard drive.
Removing the Cover
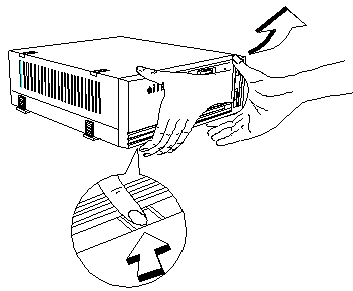
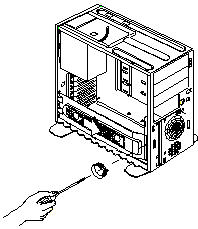
Press the holding tabs underneath the front panel and pull the panel from the housing.
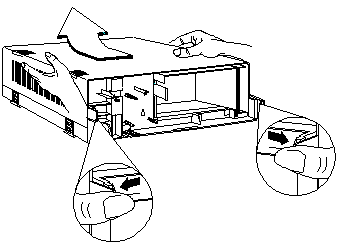
- Press the tabs on the sides outward and push them slightly to release.
- Slide the cover back about half an inch.
- Lift up the cover.
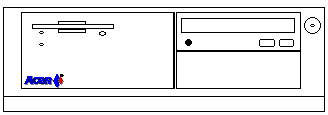
Acros Desktop (New Version)
Specifications
- Dimensions (h x d x w) - 131.3mm x 438.5mm x 384.4mm.
- 5.25 inch device bays - 3 (2 free - 1 used by CD).
- 3.5 inch device bays - 3 (1 free - 1 used by floppy , 1 by hard drive).
Removing the Cover
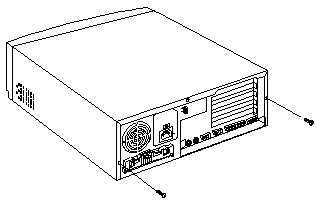
Remove the securing screws from the rear of the housing.
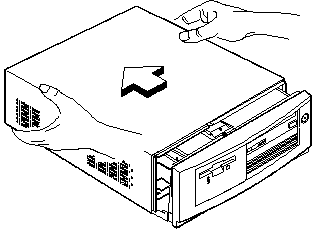
Hold the sides of the cover with both hands and slide it back about half an inch.
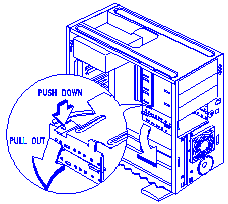
Installing Hard Disk Drive in Rear Bay
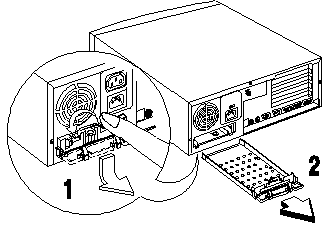
Flip down the tray handle and pull out the drive tray from the rear of the housing.
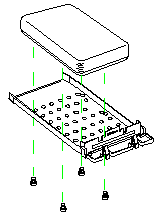
Place a hard disk on the tray. Secure the drive with four screws.
Acros Minitower (Original)

Specifications
- Dimensions (h x d x w) - 400mm x 433mm x 190mm
- 5.25 inch device bays - 3 (2 free - 1 used by CD)
- 3.5 inch device bays - 3 (1 free - 1 used by floppy , 1 by hard drive)
Opening the Housing
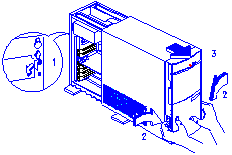
Turn the safety latch anti-clockwise to unlock the system housing. Pull the front panel release latch. Pull the front panel and detach completely from the housing.
Installing a 3.5in drive below the floppy drive
Detach the 3.5-inch drive frames from the housing. Detach the upper drive frame from the lower drive frame.
Acros Minitower (New Style)
Specifications
- Dimensions (h x d x w) - 400mm x 454mm x 190mm
- 5.25 inch device bays - 2 (1 free - 1 used by CD)
- 3.5 inch device bays - 4 (2 free - 1 used by floppy , 1 by hard drive)
Opening the Housing
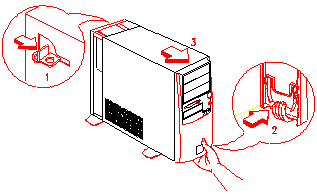
Push the safety latch to unlock the system housing. Insert your hand in the opening under the front panel. Reach for the panel handle and press it to release the cover from the housing frame. Pull the cover to detach completely from the frame.
Installing extra 3.5 inch devices
Remove the screw that holds the extra hard disk frame to the housing.
Pull the frame towards the direction of the arrow shown in the figure to release the frame tabs from the slots.
Attach the hard disks to the extra hard disk frame with the necessary screws.