Acer File Extensions |
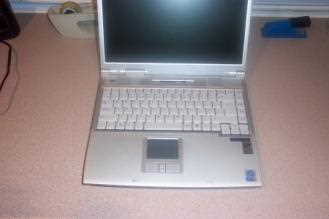
Advent 7011 Laptop
Specification
| CPU | Intel Pentium 4 2.40Ghz |
| BIOS | AMI BIOS. Press DEL to enter |
| Chipset | SIS 650 |
| Memory | 256MB PC2100/2700 DDR SODIMM (2 memory slots. Max 1GB) |
| Hard Drive | 30GB Hitachi DK23DA-30 * |
| CD Drive | QSI SBW-161 DVD/CDRW ** |
| Floppy Drive | Floppy disk drive fitted |
| Screen | 15" TFT (Native Res.1024x768) |
| Video Card | SiS 650 (64MB shared) |
| Sound Card | SiS 7012 |
| Modem | SmartLink 56K |
| Network Card | SiS 900 |
| PC Card | None |
| Ports | 1x Parallel 1x IEEE1394 (FireWire) 1x VGA 2x USB 1x LAN 1x Modem 1x Microphone 1x Headphone 1x IR 1x P/S2 1x S-Video (TV-Out) 1x Kensington Lock |
| Battery | UN34BS1-E (11.1v 5850mAh) UN34BS1-T (11.1v 5850mAh) |
| Dimensions | 38 x 318 x 258 (HxWxD in mm) |
| Weight | 3kg |
| Made By | Gericom N35AS1 |
* some may have had a 20GB drive fitted instead.
** may have a Matshita UJ-811B, or a QSI CD-RW/DVD-ROM SBW-241, or a Matshita CD-RW CW-8121 drive fitted instead.
Drivers
Your laptop should have been supplied with a "Utility and Driver CD" which contains a backup copy of all the drivers.
Memory Upgrades
Many thanks to John Thomson for the following info.
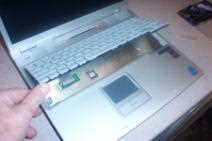
Remove the keyboard by releasing the 3 retractable clips at the front of the keyboard with a small screwdriver (these should be below the 'Fn', the 'Alt Gr', and the 'Down Arrow' keys). When removing the keyboard be careful not to damage the strip cable at the back.
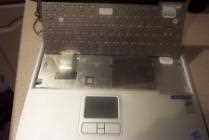
Undo and remove 2 small screws securing memory cover plate (on right hand side). Remove cover plate.
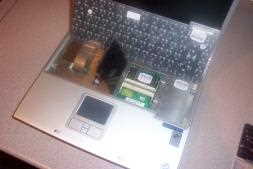
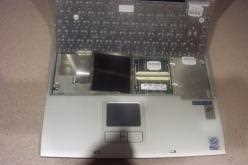
Insert the upgrade into the free slot at a slight angle (The slot in the PCB edge showd the correct way). Make sure it is fully home in the connector before applying downward pressure to secure it into the retaining clips. Refit cover, clip K/B back in.
Reboot M/C, and right click on My Computer, General Tab, and check that M/C has picked up the extra memory
Bottom of Laptop
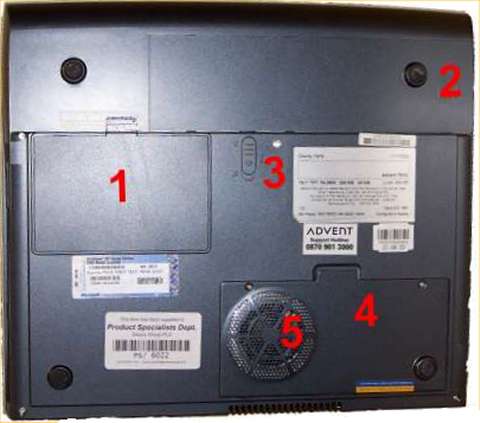
1. Hard disk drive
2. Battery pack
3. Battery pack release
4. CPU access
5. CPU fan
Function Keys
Fn + F1 - Enters Suspend Mode
Fn + F3 - Turns Battery Warning Beep on or off
Fn + F4 - Changes Display Mode: LCD-only, CRT-only and LCD&CRT
Fn + F5 - Turns Speaker Volume up
Fn + F6 - Turns Speaker Volume down
Fn + F7 - Increases Display Brightness
Fn + F8 - Decreases Display Brightness
Fn + Num Lock - Enable/Disable Numeric Keypad
In the Box
Disks Supplied
- Advent 7011 recovery CD x 3
- Nero burning ROM CD, version 5.5 OEM (serial number printed on rear of CD sleeve)
- PowerDVD CD, version 4.0 XP (serial number on front of CD sleeve)
- Microsoft Works Suite 2002
Items Supplied
- Advent 7011 Notebook
- Mains power adapter
- Mains power cable
- UK modem cable
- BT connector
Documentation Supplied
- User manual
- "Windows XP start here" guide
Recovery
A Bootable Recovery CD is supplied with these machines. To recover the system:-
- Insert CD into the drive.
- Reboot the PC.
- A warning message prompting the user to backup data before proceeding.
- Press Y to continue.
- A final warning that all data will be erased is displayed.
- Press Y to continue.
- Finally a message "Remove CD-ROM when prompted" is displayed.
- Press Y to continue.
- The image file will load. Once complete the user is prompted to remove the CD and press CTR + ALT + DEL to restart.
Driver CD
The notebook is supplied with a Utility CD. This can be used to restore corrupt drivers. The folders on the CD contain the following -
- Driver: Drivers for all the hardware.
- Manual: This folder contains individual PDF files for each chapter
- Utility: Flash BIOS Utilities, HDPrepare, QKey
FAQ
How Do I Remove the DVD Drive?
Thanks to Tony Castles for the following info -
- Remove HDD
- Lift out keyboard (see "Memory Upgrades" section above)
- Remove large screw in centre of plate
- Push CD/DVD drive out using the side exposed under the HDD
- CD/DVD fascia secured by single (black) screw, then pull off
How Do I Access the CMOS Battery?
As far as I know to get to the CMOS Battery you need to remove the hard disk drive.